---
title: Setting up SSO for OneLogin
description: Step-by-step guide to configuring OneLogin as your identity provider for Toggl 2.0 single sign-on.
---
[Skip to content](https://docs.toggl.com/setting-up-sso-for-onelogin#main-content)
English
Show submenu for translations
[](https://docs.toggl.com/?hsLang=en)
Open main navigation
Close main navigation
- English
Show submenu for translations
- [Go to Toggl](https://focus.toggl.com/)
[Go to Toggl](https://focus.toggl.com/)
How can we help you?
- There are no suggestions because the search field is empty.
1. [Toggl 2.0 Knowledge Base](https://docs.toggl.com/?hsLang=en)
2. [Admin Settings & Security](https://docs.toggl.com/admin-settings-security?hsLang=en)
3. [Single Sign-on](https://docs.toggl.com/admin-settings-security?hsLang=en#single-sign-on)
# Setting up SSO for OneLogin
## Follow these steps if OneLogin is your identity provider.
Here's how to setup SSO if OneLogin is your iDP.
1. In the OneLogin admin panel, go to **Applications** and click **Add App. 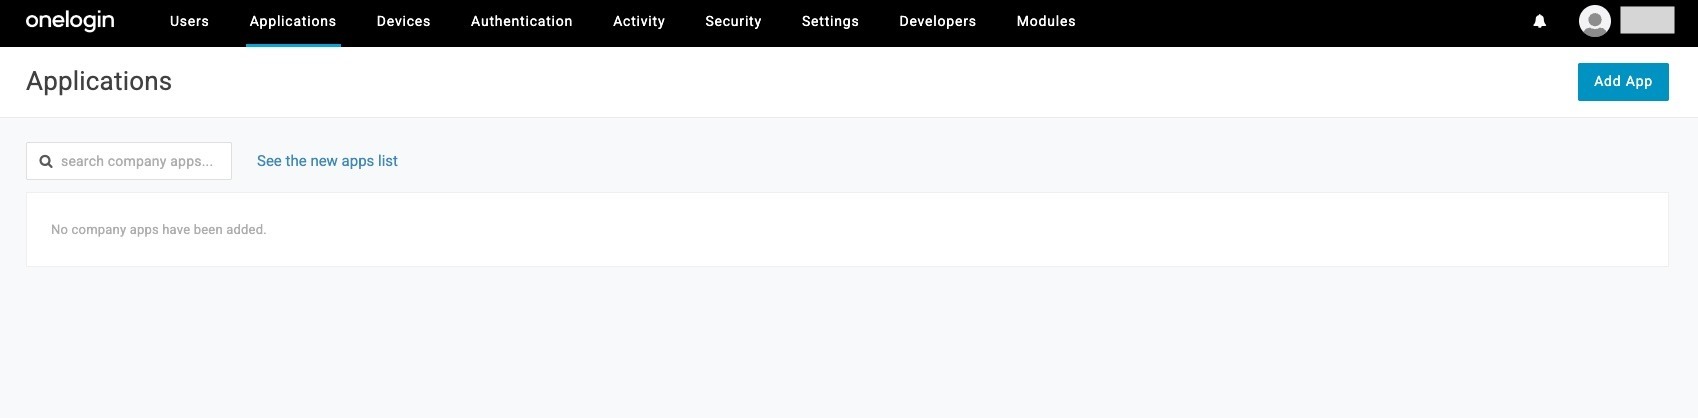**
2. Search for **SAML** and select **SAML Custom Connector (Advanced). 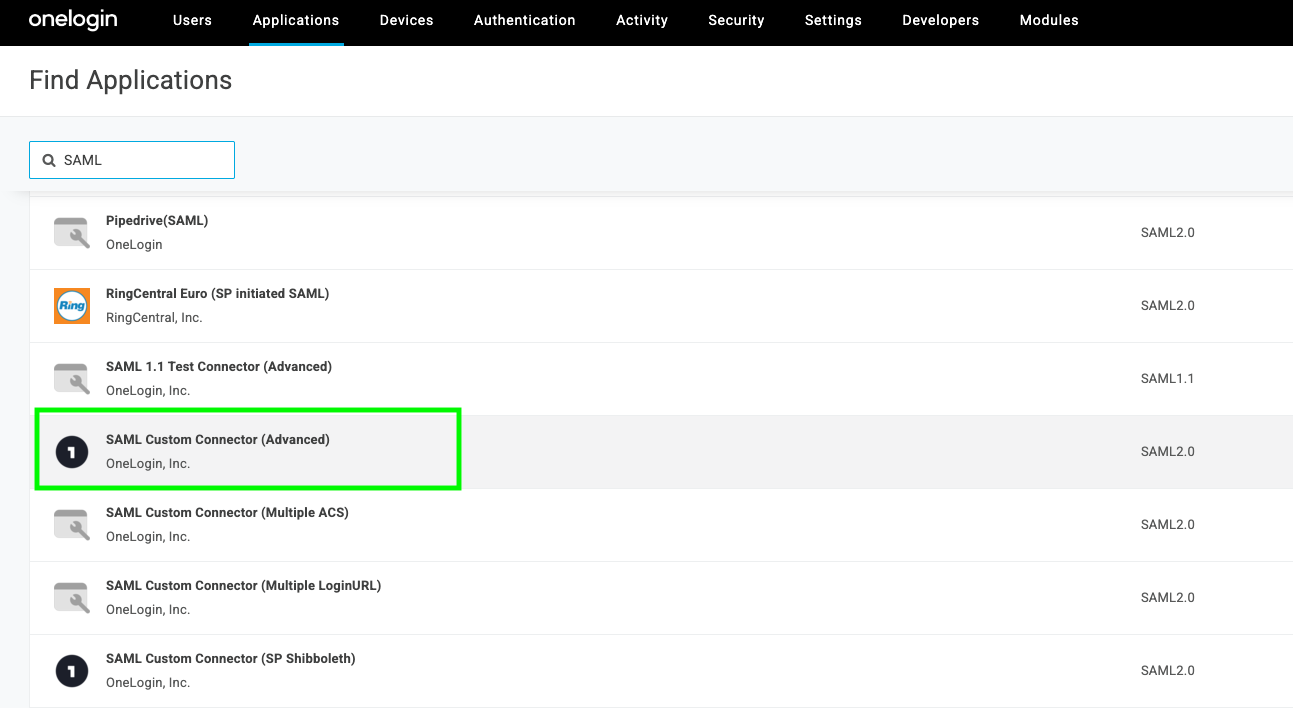**``
3. Name the app, add a logo, and click **Save -3.png)**``
4. Open the **Configuration** section — you'll see fields to fill in, which come from Toggl.
5. In a new tab, go to Admin settings → Organization → Single sign-on in Toggl 2.0 and click New SSO profile.
6. Set the profile name and company domain, and note the **ACS URL** and **Entity ID** shown. 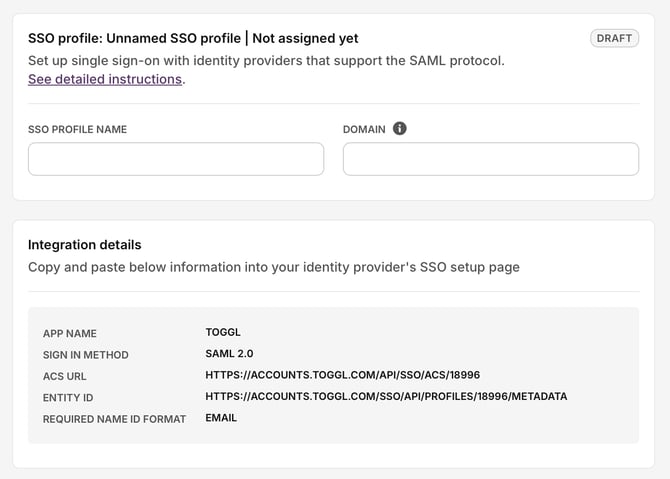``
7. Back in OneLogin, enter the Entity ID into **Audience (EntityID)** and the ACS URL into **ACS (Consumer) URL**. For the **ACS (Consumer) URL Validator**, use:
```
^https:\/\/accounts\.toggl\.com\/api\/sso\/acs\/\d+$
```
**Note:** For Identity Provider–initiated login, append `?toggl_product=focus` to the **ACS (Consumer) URL** field, and adjust the validator to `^https:\/\/accounts\.toggl\.com\/api\/sso\/acs\/\d+`.
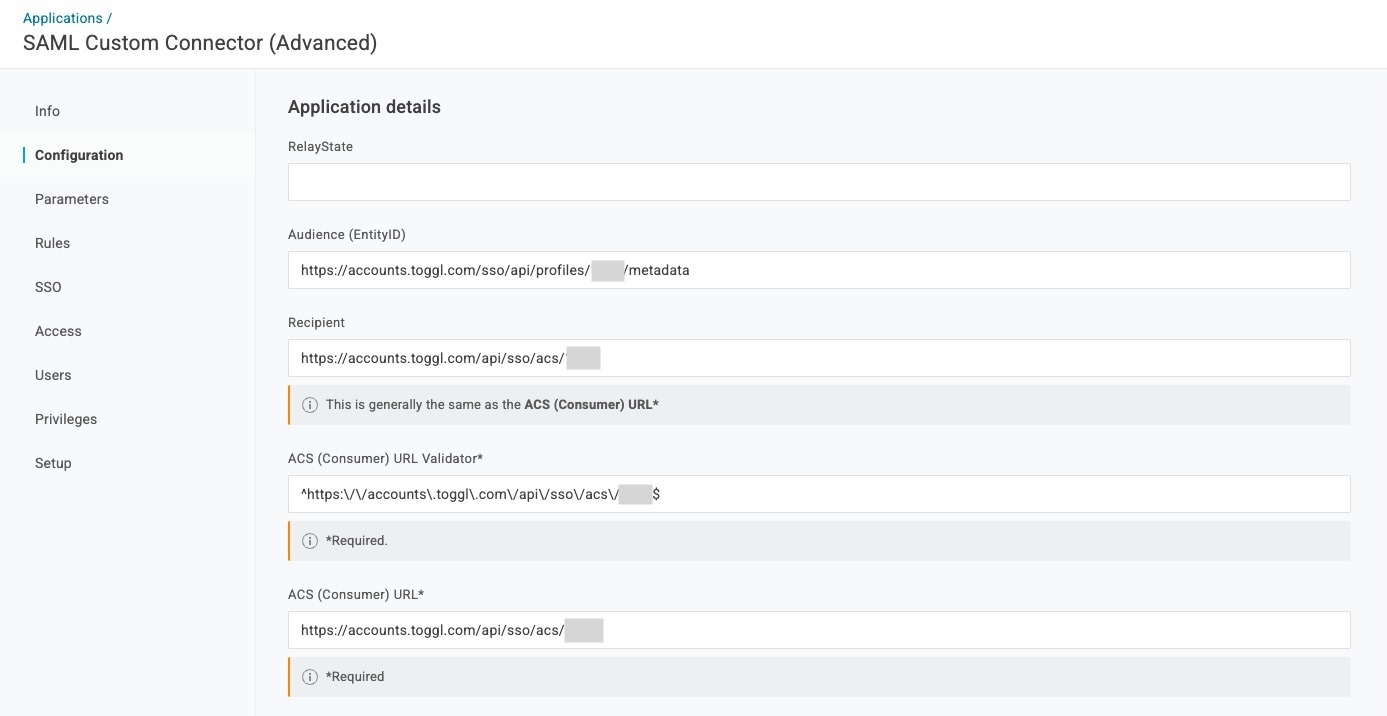
8. Also set **SAML initiator** to **Service Provider**, **SAML nameID format** to **Email**, and **SAML signature element** to **Response** (avoid **Assertion** here to prevent issues).
9. Click **Save**.
10. On the **SSO** tab, copy the **Issuer URL**. 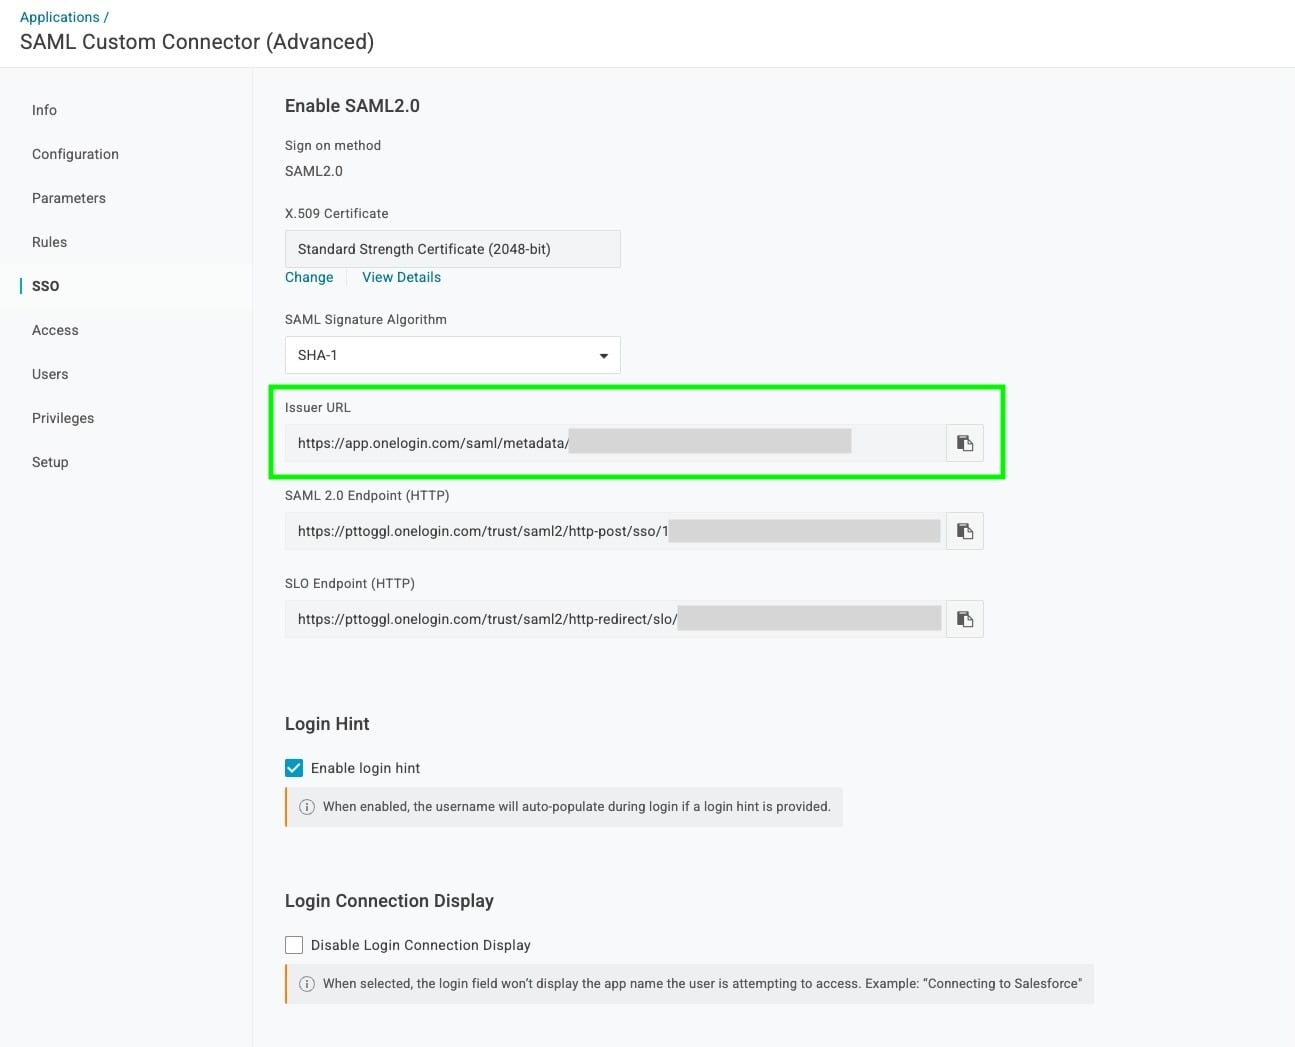``
11. Back in the Toggl SSO profile, tick **I have access to an IdP metadata URL** and paste it in. 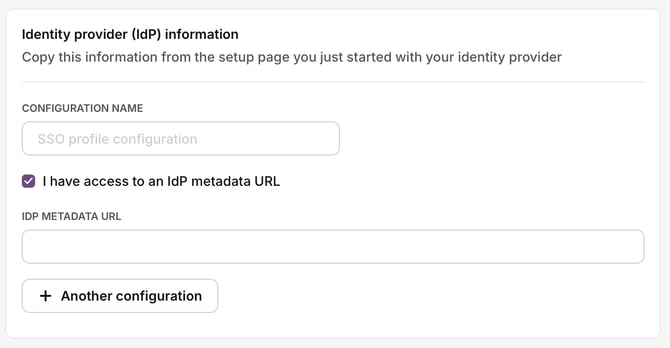
12. Click **Submit for review**.
13. Configuration's done — Toggl's team will verify the domain and notify you by email. ``
- [Getting started](https://docs.toggl.com/getting-started?hsLang=en#main-content)
- [Start here](https://docs.toggl.com/getting-started?hsLang=en#start-here)
- [Quickstart Guides](https://docs.toggl.com/getting-started?hsLang=en#quickstart-guides)
- [Set up your Workspace](https://docs.toggl.com/getting-started?hsLang=en#set-up-your-workspace)
- [Toggl Guides for Toggl Track and Toggl Plan users](https://docs.toggl.com/getting-started?hsLang=en#toggl-guides-for-toggl-track-and-toggl-plan-users)
- [Using Toggl, page by page](https://docs.toggl.com/using-toggl-page-by-page?hsLang=en#main-content)
- [Timer](https://docs.toggl.com/using-toggl-page-by-page?hsLang=en#timer)
- [Reports](https://docs.toggl.com/using-toggl-page-by-page?hsLang=en#reports)
- [Projects](https://docs.toggl.com/using-toggl-page-by-page?hsLang=en#projects)
- [Tasks](https://docs.toggl.com/using-toggl-page-by-page?hsLang=en#tasks)
- [Timeline](https://docs.toggl.com/using-toggl-page-by-page?hsLang=en#timeline)
- [Members](https://docs.toggl.com/using-toggl-page-by-page?hsLang=en#members)
- [Approvals](https://docs.toggl.com/using-toggl-page-by-page?hsLang=en#approvals)
- [Time Off](https://docs.toggl.com/using-toggl-page-by-page?hsLang=en#time-off)
- [Profile Settings](https://docs.toggl.com/using-toggl-page-by-page?hsLang=en#profile-settings)
- [Admin Settings & Security](https://docs.toggl.com/admin-settings-security?hsLang=en#main-content)
- [Workspace Setup](https://docs.toggl.com/admin-settings-security?hsLang=en#workspace-setup)
- [Tracking & Rates](https://docs.toggl.com/admin-settings-security?hsLang=en#tracking-rates)
- [Single Sign-on](https://docs.toggl.com/admin-settings-security?hsLang=en#single-sign-on)
- [Subscription & Billing](https://docs.toggl.com/subscription-billing?hsLang=en)
- [Toggl Apps](https://docs.toggl.com/toggl-apps?hsLang=en#main-content)
- [Mobile](https://docs.toggl.com/toggl-apps?hsLang=en#mobile)
- [Desktop](https://docs.toggl.com/toggl-apps?hsLang=en#desktop)
- [Browser Extension](https://docs.toggl.com/toggl-apps?hsLang=en#browser-extension)
- [API & Integrations](https://docs.toggl.com/api-integrations?hsLang=en)
- [Troubleshooting & FAQs](https://docs.toggl.com/troubleshooting-faqs?hsLang=en#main-content)
- [My Toggl Acount](https://docs.toggl.com/troubleshooting-faqs?hsLang=en#my-toggl-acount)
- [Common Questions](https://docs.toggl.com/troubleshooting-faqs?hsLang=en#common-questions)
Copyright © 2026. Toggl. [Privacy Policy](https://toggl.com/legal/focus/privacy/)