
Toggl's MCP server connects AI assistants to your Toggl data through the Model Context Protocol. You add it by pasting one link into your assistant, then signing in to Toggl. There's nothing to install. For a map of every Toggl connection, see the integrations overview.
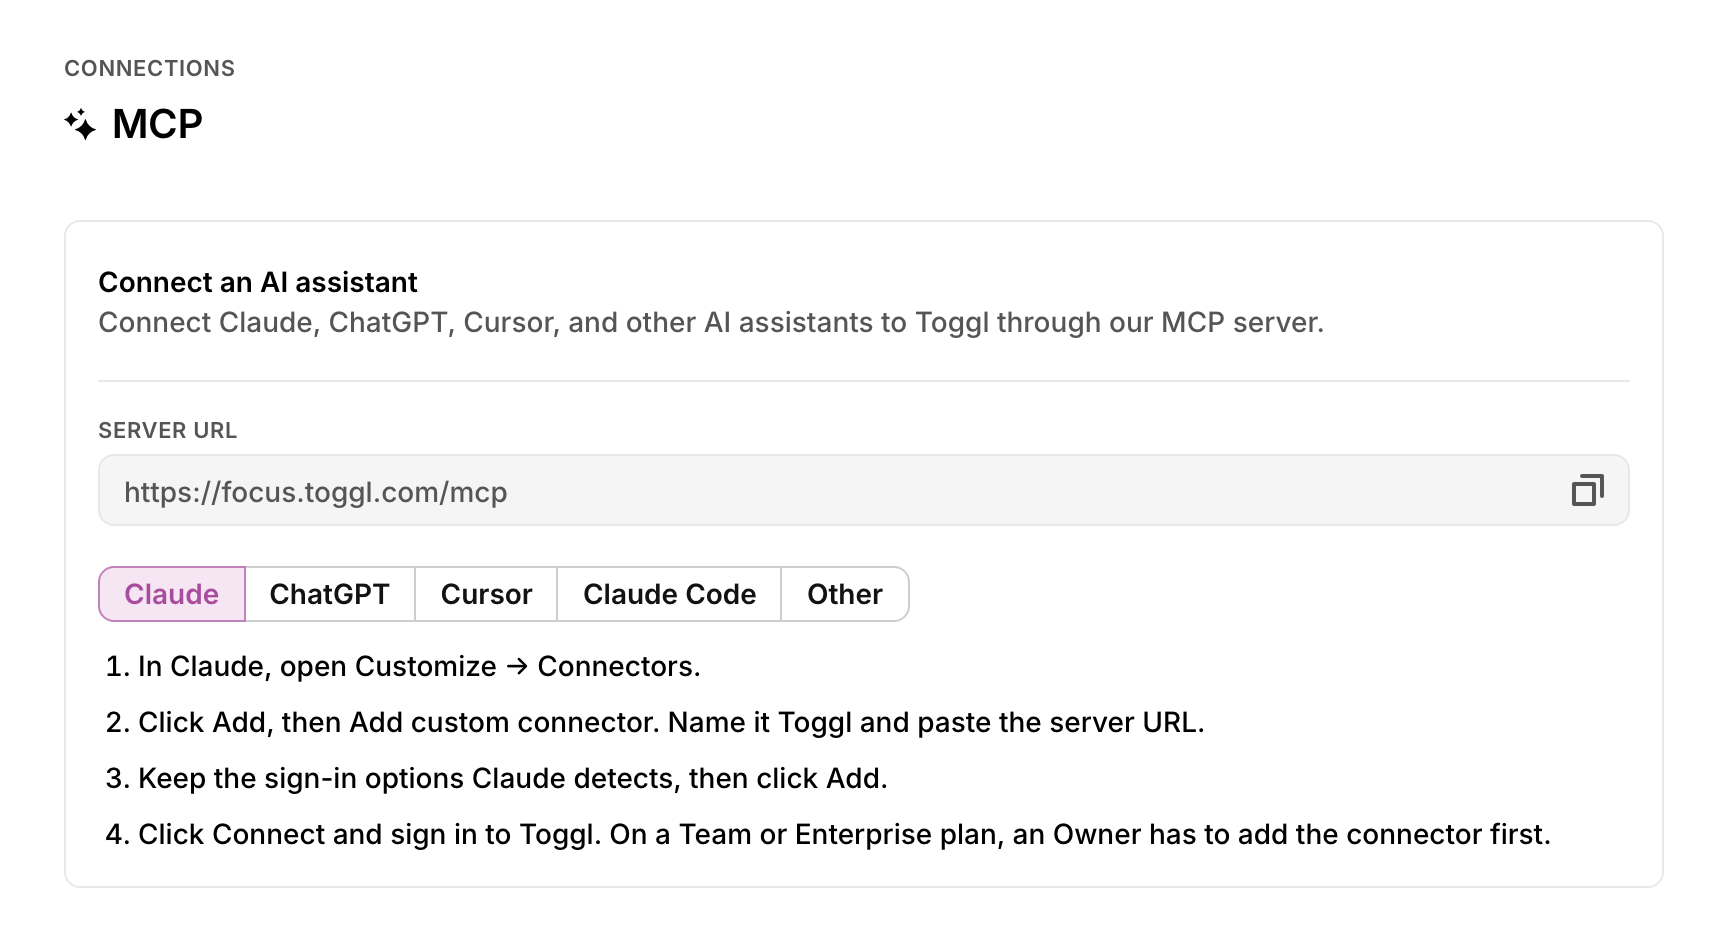
The server URL
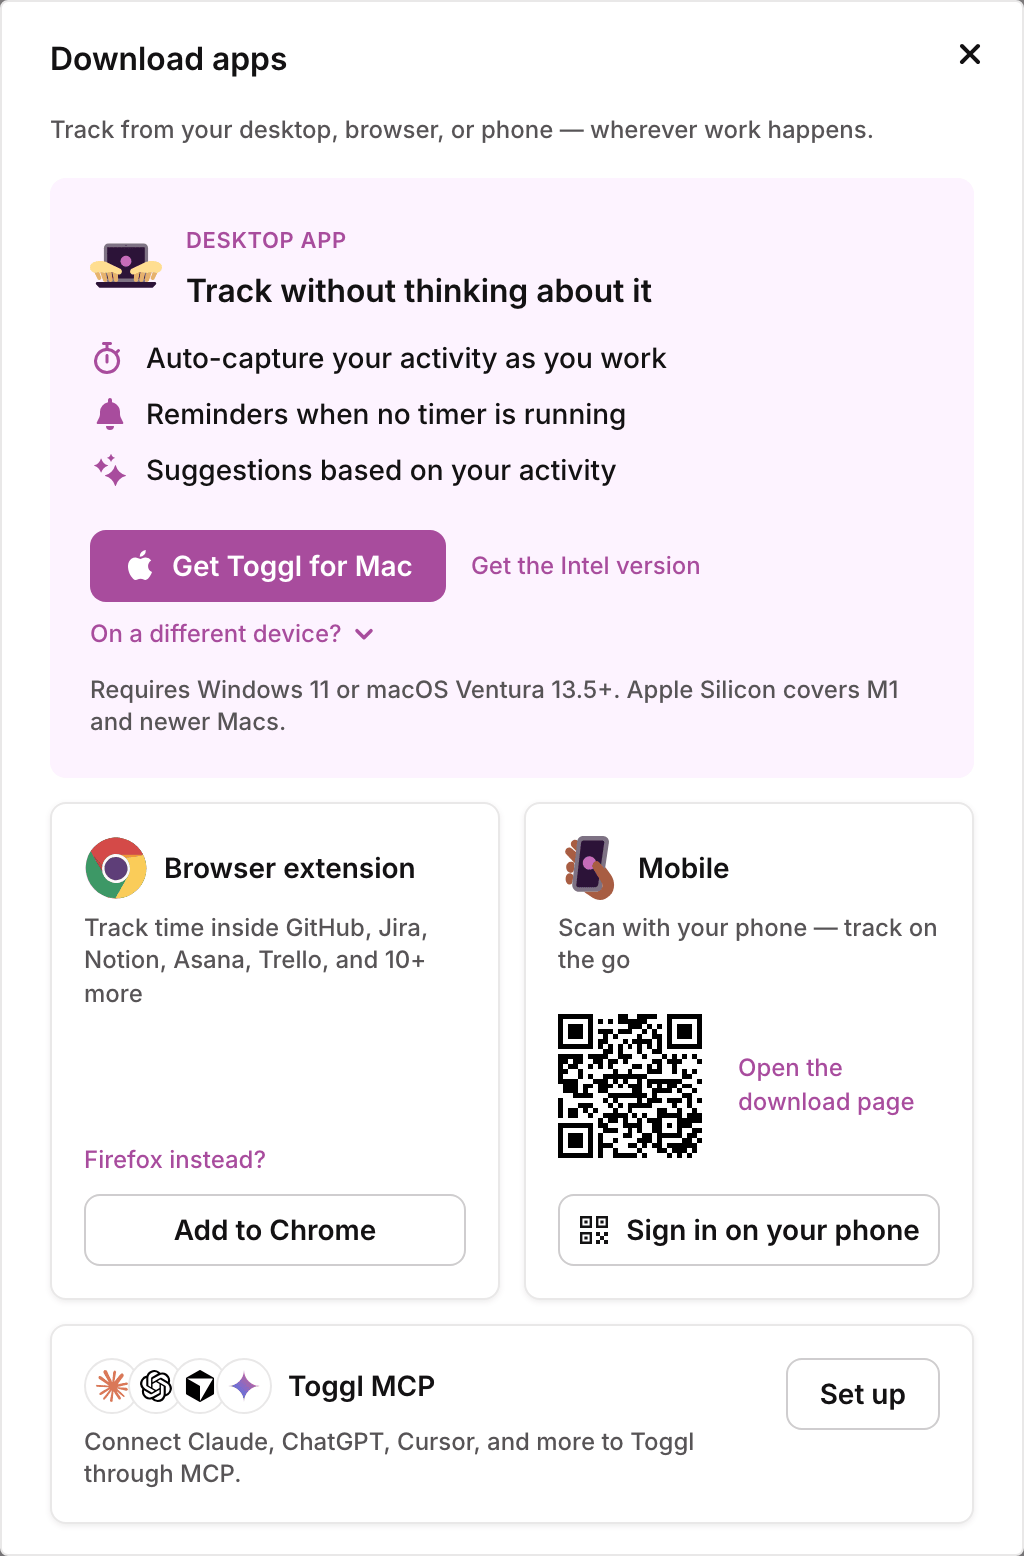
You can also copy it in Toggl: open Admin settings → Connections → MCP, or select Download apps → Toggl MCP → Set up. The same page shows the steps for each assistant.
Connect your assistant
Claude
- In Claude, open Customize → Connectors.
- Click Add, then Add custom connector. Name it Toggl and paste the server URL.
- Keep the sign-in options Claude detects, then click Add.
- Click Connect and sign in to Toggl. On a Team or Enterprise plan, an Owner has to add the connector first.
More details: Connect Toggl to Claude.
ChatGPT
- In ChatGPT, open Plugins.
- Click +, then Add custom MCP server.
- Name it Toggl, paste the server URL, and configure authentication.
- Accept the warning, click Create as a plugin, then sign in to Toggl.
More details: Connect Toggl to ChatGPT.
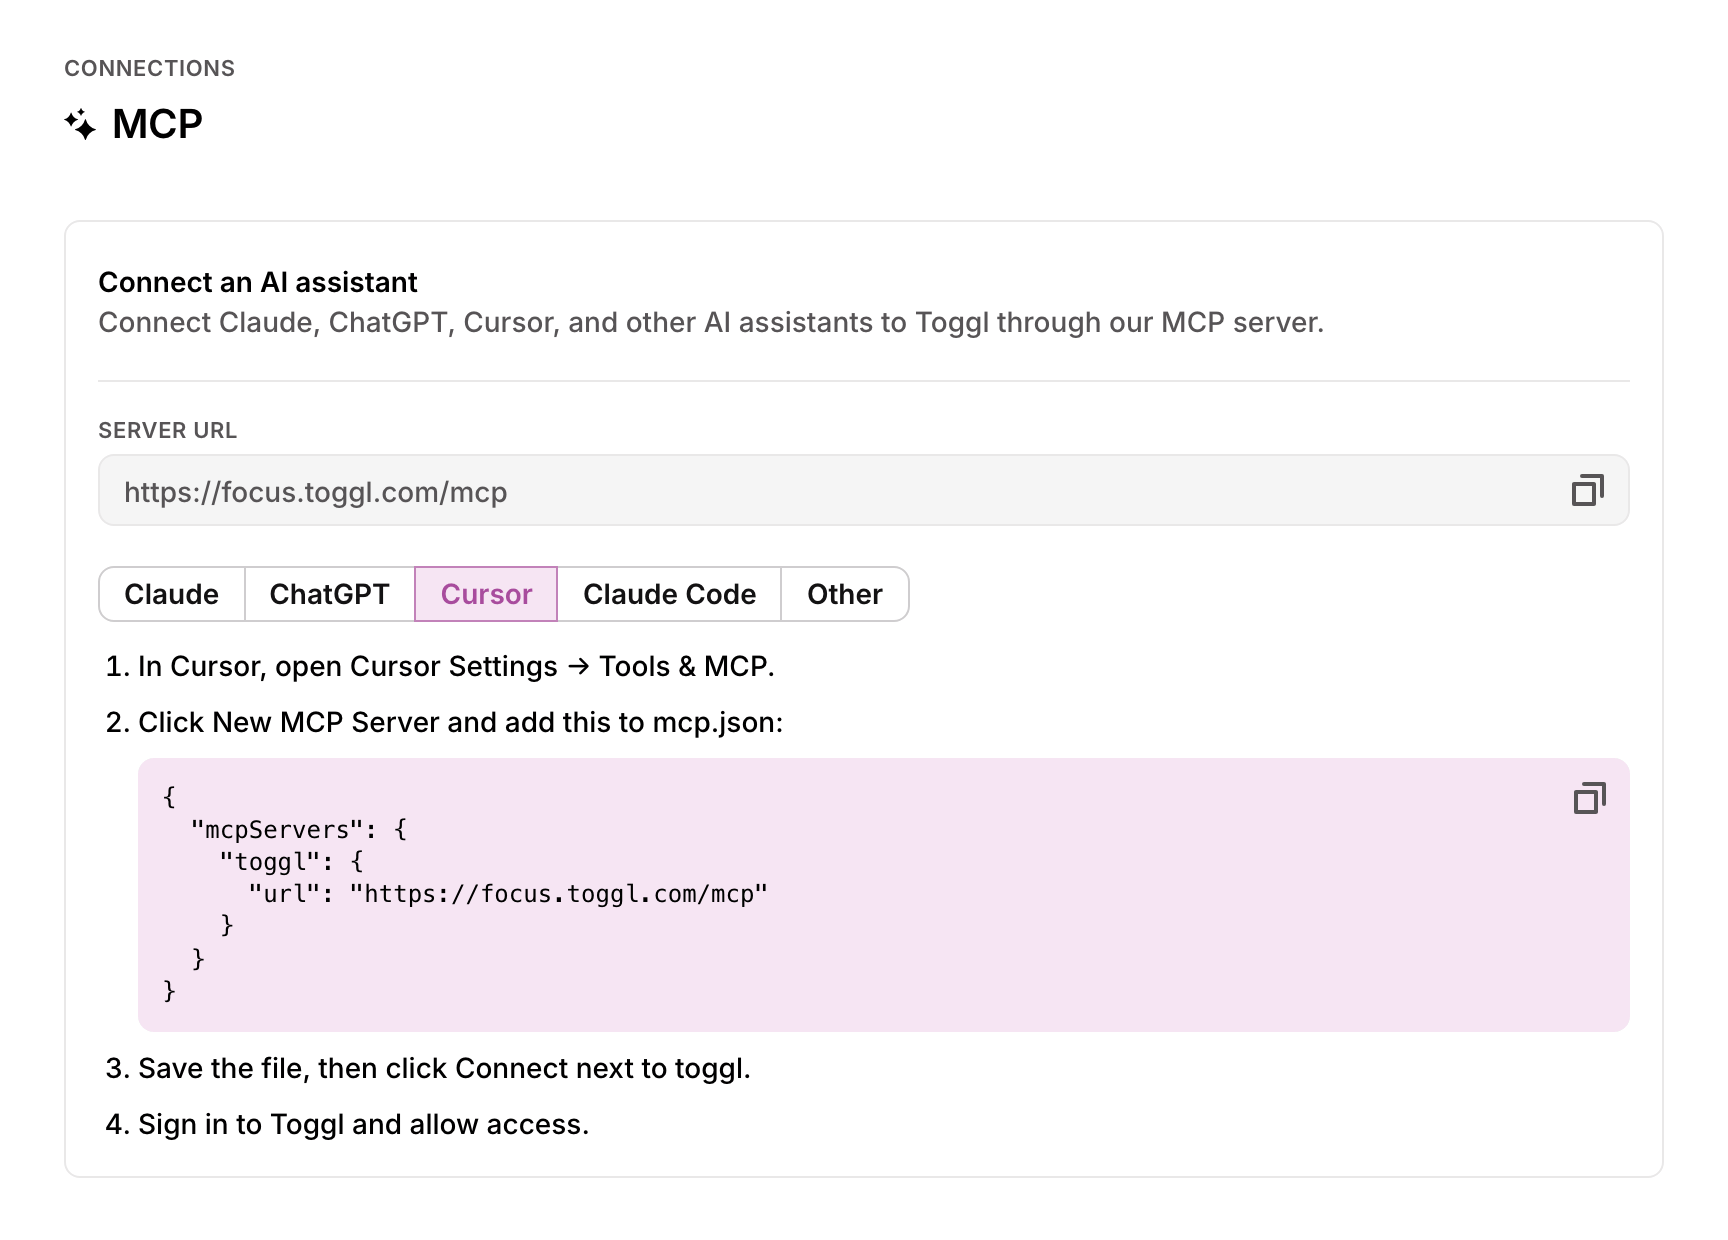
Cursor
- In Cursor, open Cursor Settings → Tools & MCP.
- Click New MCP Server and add this to mcp.json:
{
  "mcpServers": {
    "toggl": {
      "url": "https://focus.toggl.com/mcp"
    }
  }
}- Save the file, then click Connect next to toggl.
- Sign in to Toggl and allow access.
Claude Code
- In your terminal, run:
claude mcp add --transport http toggl https://focus.toggl.com/mcp- Start Claude Code and run
/mcp. - Choose toggl, then Authenticate.
- Sign in to Toggl and allow access.
Other assistants
- In your assistant's settings, add a remote MCP server.
- Paste the server URL and choose Streamable HTTP if it asks for a transport.
- Connect, then sign in to Toggl and allow access.
Works with VS Code, Windsurf, and any assistant that supports remote MCP servers with sign-in.
Signing in and workspaces
When you connect, your assistant opens Toggl so you can sign in. You don't need an API token. If you belong to more than one organization or workspace, ask your assistant "Which Toggl workspaces can I access?" and tell it which one to use.
What you can do
Through MCP you can work with Toggl data including:
- Tasks: list, create, update, delete
- Projects: list, create, update, archive
- Time entries: list, start, stop, create, update
- Time blocks: planned calendar time
- Reports: query report data
- Organization: workspaces, members, invitations (based on your access level)
Changes made through MCP or the CLI are attributed to your Toggl account, and supported record changes appear in your workspace's Audit Log.
Plan availability and limits
There is no separate cap on MCP or CLI requests. Your Toggl access level and plan determine which data and features are available:
| Plan | Access |
|---|---|
| Free | Core features available on the Free plan. Paid-only features (for example Premium reports or advanced capabilities) are not available. |
| Free (reports) | Report data requests are limited to 30 per month, same as in the web app. |
| Starter | Everything included on Starter. Premium-only features are not available. |
| Premium / Enterprise | Full access to features included on your plan. |
In practice:
- If you can do something in the Toggl web app on your plan, you can do it through MCP or CLI.
- If a feature is locked or limited in the web app, it is locked or limited through MCP and CLI too.
- MCP and CLI do not bypass plan restrictions.
Troubleshooting
Sign-in fails or the assistant can't reach Toggl
Check that you pasted the server URL exactly: https://focus.toggl.com/mcp. Remove the Toggl connection in your assistant, add it again, and sign in. If that doesn't work, restart your assistant and try again.
I get "feature not available" or permission errors
Your plan or access level doesn't include that feature, same as in the web app. Upgrade your plan or ask a workspace admin if you need access.
Report queries stop working on the Free plan
Free plans are limited to 30 report data requests per month. This applies in the web app, MCP, and CLI. Wait until the next month or upgrade for higher limits.
Advanced: CLI and local MCP server
These options are for developers who want to work from a terminal or run the MCP server on their own machine. Most people should use the server URL above.
Install the CLI
npm install -g @togglhq/cli Or run it without installing:
npx @togglhq/cli Sign in once:
toggl auth This opens your browser to sign in and saves your session locally. Use toggl profile commands to switch between saved accounts or workspaces.
CLI basics
# See your projects toggl projects list # Create a task toggl tasks create --data '{"name": "Write weekly report", "project_id": 123456}' # Start and stop a timer toggl time-entries start --task-id 12345 toggl time-entries stop # See planned time on your calendar toggl time-blocks list --date-from 2026-07-01 --date-to 2026-07-07 # List workspace members toggl users list Use toggl --help and toggl <command> --help to explore commands. Add --json for machine-readable output.
To install the agent skill for coding assistants:
toggl skill setup Run the MCP server locally
If your assistant doesn't support remote MCP servers, add the local server (@togglhq/mcp) to its MCP config instead:
{ "mcpServers": { "toggl-focus": { "command": "npx", "args": ["-y", "@togglhq/mcp"] } } } On first use, your assistant opens your browser to sign in. The session is saved locally and refreshes automatically; sign in again to switch workspaces or after about 4 weeks without use. The server is also listed in the official MCP Registry.