
Tags are flexible labels you add for extra categorization: activity type, billing status, location, work category, and similar. Unlike a project or a client, a tag isn’t a container — the same tag can sit on many tasks, projects, and time logs at once, which is what makes it useful for filtering across the workspace.
Where tags attach
You can add tags to:
- Tasks — including subtasks, which have their own tags (they don’t inherit from the parent)
- Projects
- Time logs — independently of the linked task
When a time log is linked to a tagged task, it starts with that task’s tags. Changing the tags on the time log applies to that time log only — the task is unchanged. Choose Use the task’s tags if you want the time log to follow the task again.
Time logs without a task can still have tags; they just can’t inherit any.
On the mobile app, changing tags on a time log currently updates the task’s tags rather than the time log itself. Per-time-log tags on mobile will land separately.
Managing tags in Admin settings
The workspace tag list lives in Admin settings → Tags. This is where you review, search, create, rename, and delete tags for the whole workspace.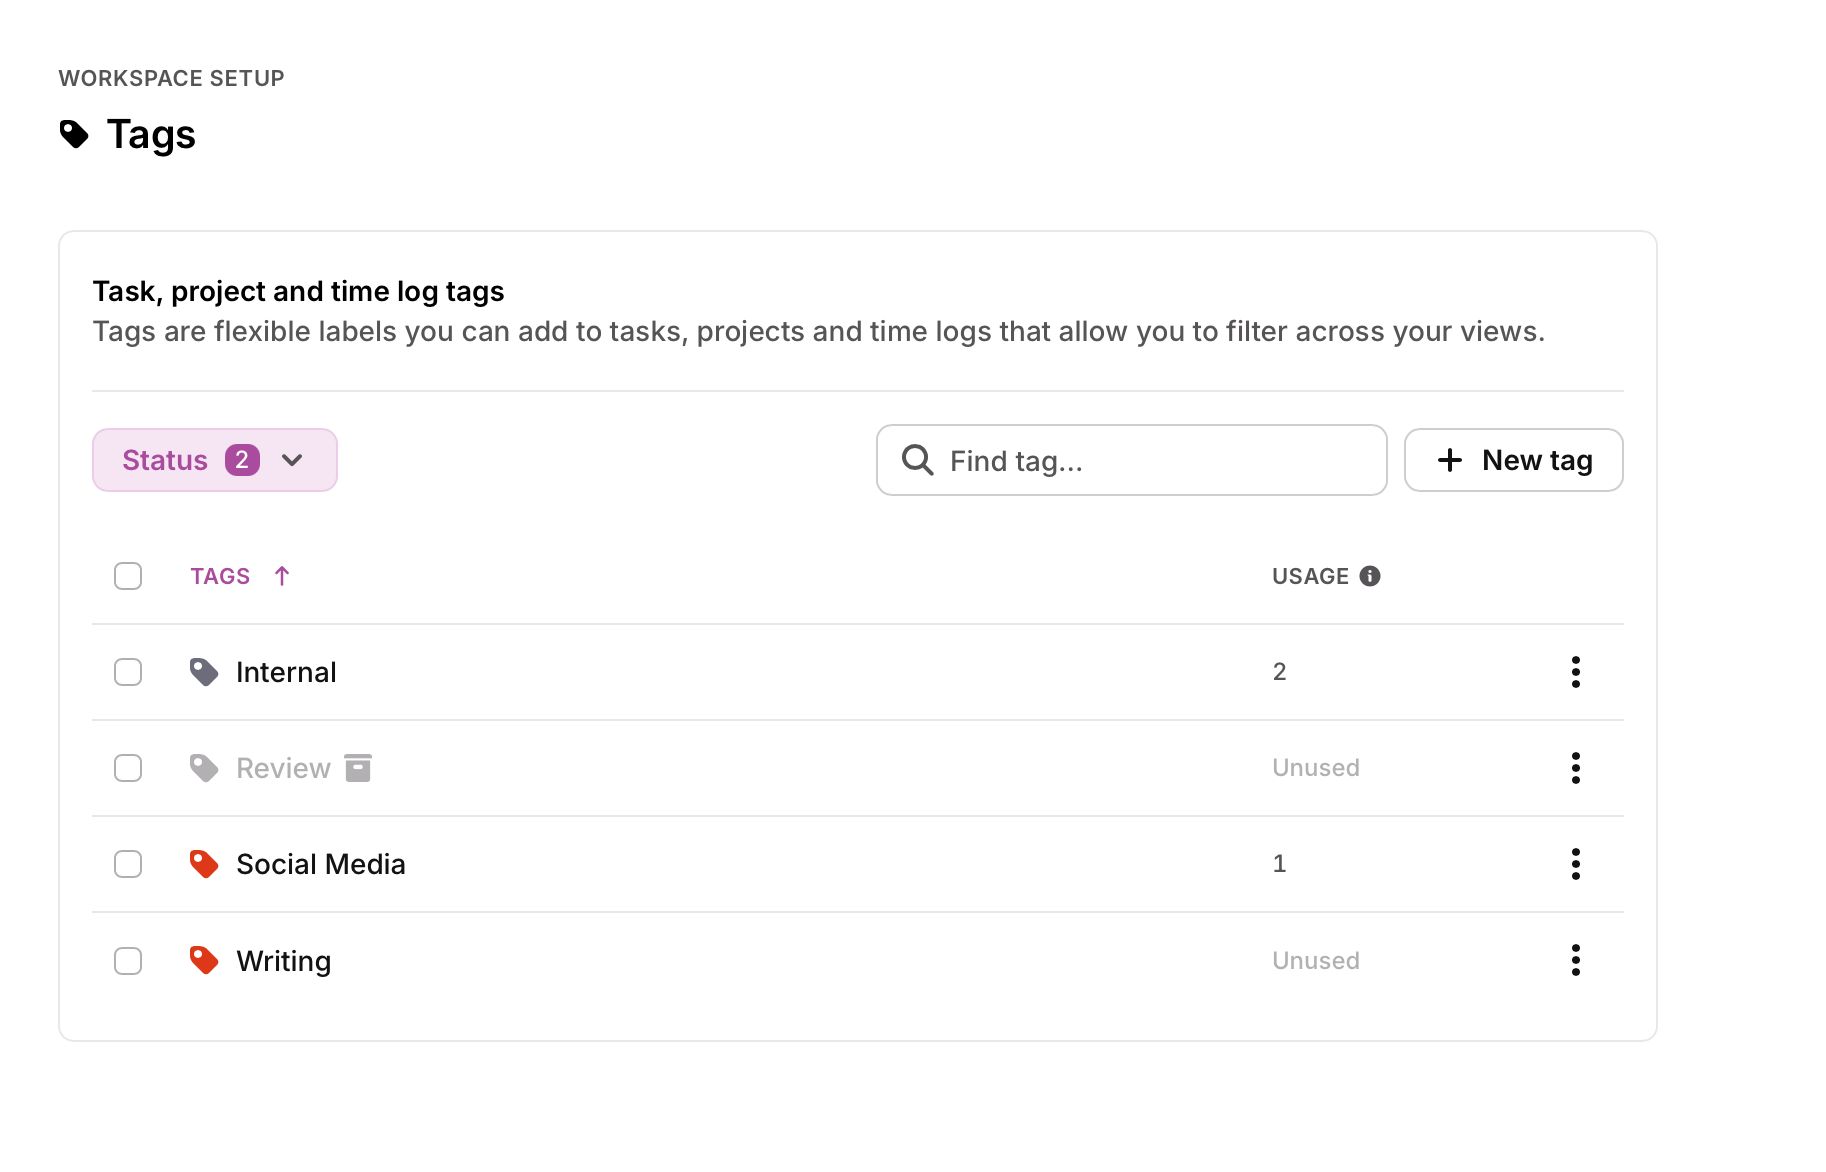
Tags created here are available to assign to any task, project, or time log in the workspace.
Create a tag
- Go to Admin settings → Tags.
- Click New tag.
- Enter a name and pick a color.
- Click to save.
To add several tags at once, type the names in the same field, separated by commas — for example design, client-review, billable. A preview of each name appears as you type. Existing names in the list are skipped rather than rejected, so a paste that includes tags you already have still creates the rest. You can add up to 100 names at a time.
If a search returns no results, you can create the tag from the empty state — the name you searched is already filled in.
Search, sort, and page
The table shows 10 tags per page. You can also see how many times a Tag has been used.
- Use Find tag… to search by name.
- Click the Tags column header to sort A–Z or Z–A.
- Use the page control at the bottom to move through the list.
Rename a tag
Click the tag’s name in the table, type the new name, and press Enter or click away. Press Escape to cancel.
To change the color as well as the name, open the ⋮ menu on the row and choose Edit.
Delete a tag
Open the ⋮ menu on the row and choose Delete, or select several rows and delete them in bulk (the checkbox in the header selects every tag on the current page).
Deleting a tag removes it from every task, project, and time log it’s on. Reports and saved filters that use it will change.
A toast appears after a delete. Click Undo (or use your keyboard undo shortcut) to restore the tag and its assignments.
Archive a tag
Open the ⋮ menu on the row and choose Archive, or select several rows and archive them in bulk.
Merge tags
Use multi-select to select the tags you want to merge. 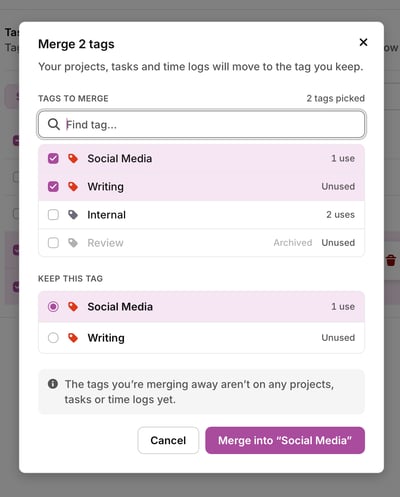
Who can manage tags
Who can create, rename, and delete tags is controlled in Admin settings → Access, under Allow members to manage tags:
- Full access — all roles can create, rename, and delete
- Edit access — all roles can create and rename
- Restricted access — only admins and managers can manage tags
- Custom access — set it per role
Time Trackers can apply tags to their own work but cannot manage the workspace list. See User Roles in Toggl 2.0 and Toggl 2.0 Settings & Preferences.
Applying tags as you work
You don’t have to create tags in Admin settings first. From a task, project, or time log, open the tag picker, type a name, and create it on the spot — it is added to the workspace list and applied in one step.
Tags can also be:
- Set in bulk edit on tasks, projects, or time logs
- Grouped on in the Tasks list (group by tag; you can stack grouping levels)
- Filtered on the Timeline and in reports (detailed reports include a Tags column)
- Used as the scope of a Goal — see Goals in Toggl 2.0
- Imported from a CSV, including from other tools — see Universal CSV Importer
Admins on Premium and above can make Tags a required field on tasks, so a task can’t be saved until at least one tag is set. See Required Fields for Tasks and Time Logs.
Tags vs Custom Fields
Use tags when the label is freeform and applied by the people doing the work. Use Custom Fields (Premium and above) when an admin needs a fixed, reportable set of values — billing codes, cost centers, region, and similar.
See Project-level custom fields and Task-level custom fields.
How this compares to Toggl Track
In Toggl Track, tags live only on time entries and are managed from a dedicated Tags page in the sidebar.
In Toggl 2.0, tags live on tasks, projects, and time logs, and the workspace list is managed from Admin settings → Tags. Time logs can keep the tags from their task or carry their own.